Showing posts with label dessert. Show all posts

Friday, April 20, 2012

Coco Chocolate: good enough to make me like sweets


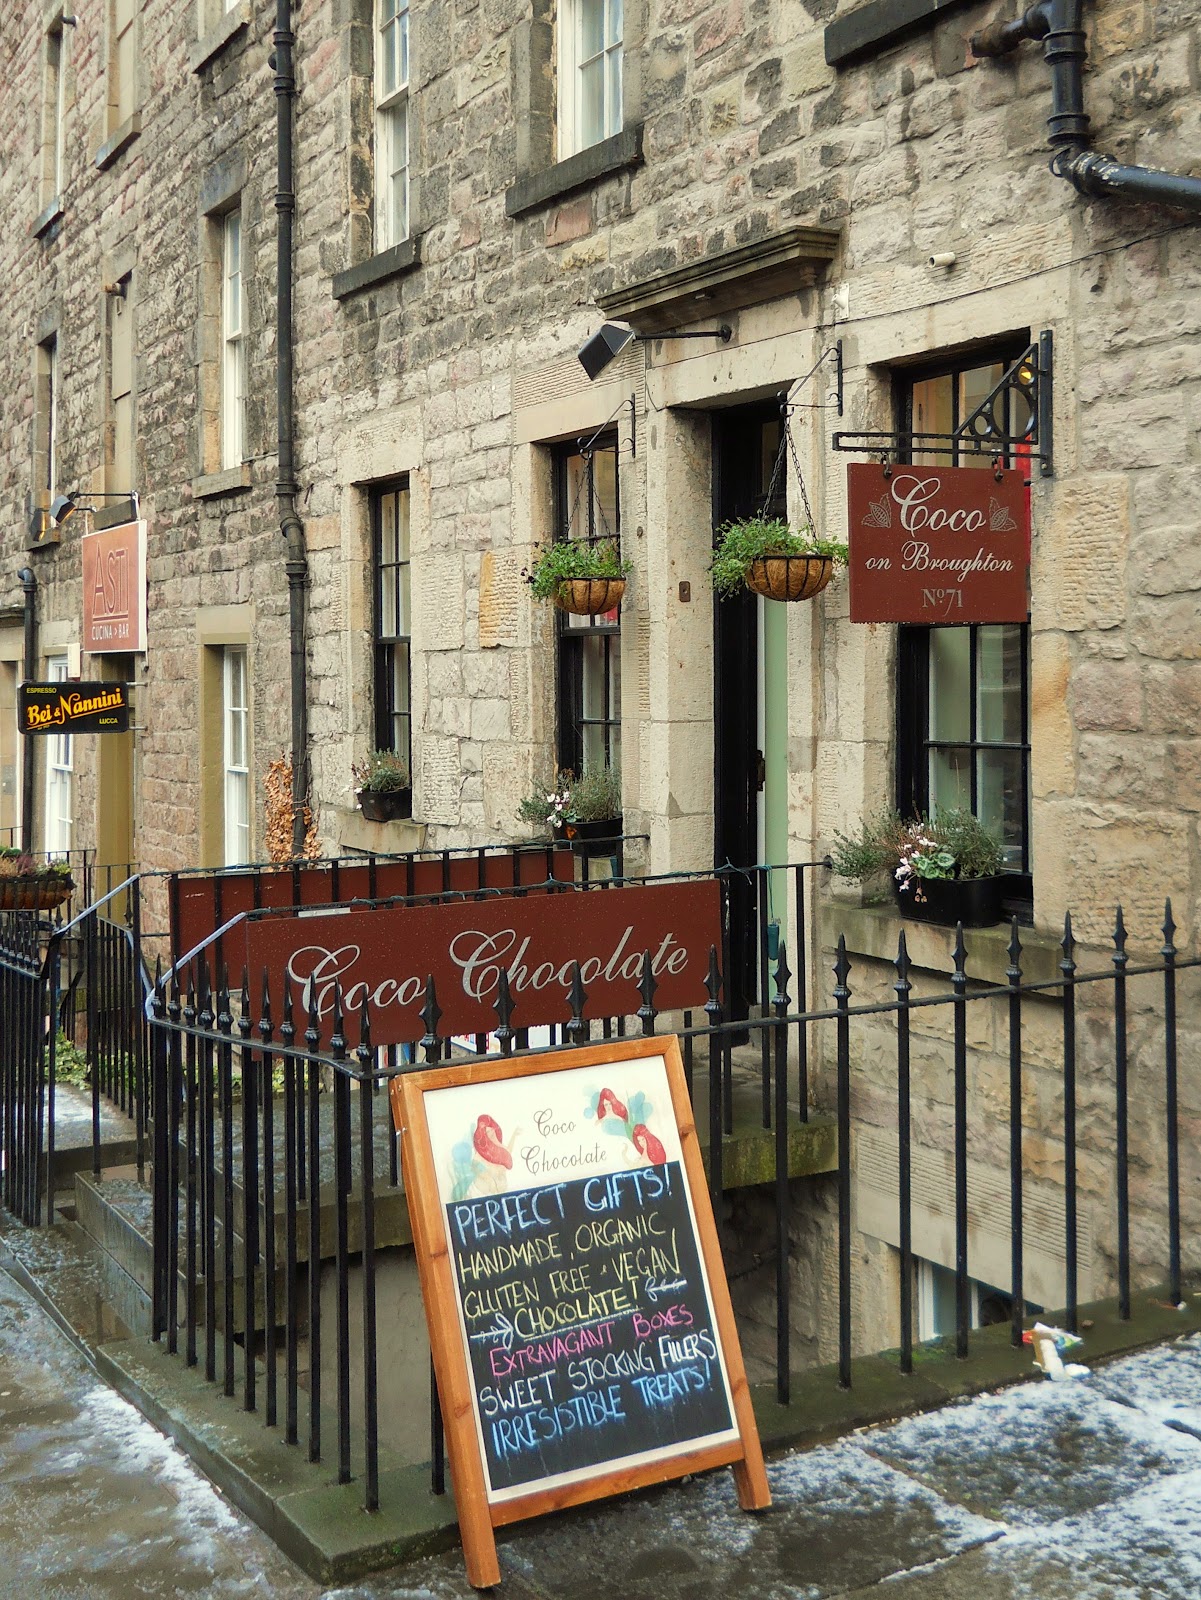
Note they advertise their vegan chocolate on the sign...

I suppose that title is a little extreme. I don't always hate sweet foods, I just don't feel drawn to them at all. At restaurants, the dessert menu holds no sway for me. Every once in a while, I'll want a little taste of something sweet, but I never really enjoy more than a couple of bites. A piece of baklava is perfect. The only exception I can think of is cake, though I tend to scrape off the icing. A travesty, I know.

Most people, when they hear this, say, "Oh, you're so lucky! My sweet tooth owns me" or something similar. And to them I say, "People, you haven't seen me eat mashed potatoes." Starches and salt, and I'm helpless. It's a trade-off.

But, as with a really good homemade baklava (that's you, Palmyra), every once in a while, something will hit me hard. And such it was with my first experience at Coco Chocolate in Edinburgh.


 Their hand-made organic chocolates are so appealing, the in-house graphic design so lovely, and the store itself so inviting, that I fell a little bit in love. I took their chocolates home to Tennessee as Christmas gifts to all of my favorite people (Haggis spice! Frankincense and myrrh with gold dust! Date and ginger!), and was delighted to learn that all of their dark chocolate is vegan.  
 

As  I was deciding on my first visit what kind of  made-to-order-from-the-real-deal vegan hot chocolate I wanted, the young lady behind the counter mentioned their award-winning rose and black pepper flavor, so naturally I had to try that. Rose isn't my favorite, but with each sip I was sensing every flavor, how the new tastes interacted with the underlying flavors of the chocolate, the texture of the liquid with tiny bits of melting chocolate suspended through it - such a memorable experience. I’ve since had the Aztec hot chocolate, which in truth I liked much better, but I really don't doubt that you could walk in off the street and order anything and it would be great.


One of my complaints about some artisanal food products and haute cuisine in general is that sheer novelty doesn't always make for good food. "Creative" (read: bizarre) flavor combinations aren't always pleasant, or even palatable. Sometimes, they make you want to spit that wild mushroom foam right into your napkin. Occasionally, though, they are surprising, challenging, and can make you think differently about food and taste.


While Coco offers all the classics made with the great care, it is their more unusual pairings that I'm drawn to - pink peppercorn and nutmeg, hazelnut and sea salt, and even a tobacco-flavored dark chocolate bar. Each is carefully thought out to complement the chocolate's own complex flavor, and in my experience they have all succeeded. 


I came home from my most recent visit with tobacco and date and ginger dark chocolate bars, which I’ve been enjoying a little piece at a time. During that visit I also learned that they serve mochas, so I’ll be back soon. And while I’m there, I might pick up that orange, lemon and geranium bar… and the lime and coconut, just to celebrate it almost being summer… and I really want to try the Earl Grey dark chocolate… 

Those are candied flower petals in the dish


If you're lucky enough to be in the Edinburgh area, you can find Coco Chocolate at 71 Broughton Street, Edinburgh EH1 3RJ, or 174 Bruntsfield Place, Edinburgh EH10 4ER, or visit their website. They also run a chocolate school in Roslin for the amateur confectioners among us. The owner is Australian, and chose to return home after gifting the UK with her delightful stores, and there are two Coco Chocolate shops in Australia, if there are any interested Aussies out there. Enjoy!

Tuesday, February 15, 2011

Happy Valentine's Day! Vegan Chocolate Mousse (and major discovery)


I adapted this chocolate mousse recipe from one in a Gourmet from October 2009. Perhaps you're thinking to yourself, "Emily, aren't both beaten egg yolks and whipped egg whites essential to mousse?" Well, turns out they are not, though a little bit of finagling is required. I do think, however, that I discovered something important with my combination egg-yolk-and-whipped-heavy-cream replacer - it has that tongue-coating but totally unsweet richness that real whipped cream and yolk have. I think it will work beautifully as a heavy cream, custard, or egg yolk substitute in soups, sauces, desserts, etc. Next, I'm going to try to use it in a hollandaise,  adding a little turmeric for color.

The egg white replacer could be improved, but it seems to have worked well enough.

I don't really like desserts, so when I make them, I only make them for other people, and Valentine's Day is a good holiday for that. This is very rich, much too rich for me. In fact, I was hoping it would be lighter. I think next time I would change the proportions, using more of the tofu-cream-coconut-oil mixture and less chocolate. Still, if you are a chocolate person, this should be right up your alley. In the picture above, it's served with whipped cashew cream (left over from the gateau - yum!) and this amazing fermented fruit syrup called Drizzle that I bought at Mepkin Abbey in South Carolina.

Vegan Chocolate Mousse
Makes 4 large servings or 6 smaller servings

8 oz  bittersweet chocolate (I used Ghirardelli semisweet chips)
6 Tbsp. Earth Balance or other margarine
1/2 c. firm silken tofu (aseptic tofu tents to be softer and smoother)
2 Tbsp. coconut or soy heavy cream, or a dried soy product like Better Than Milk, prepared with 2 Tbsp. water and 2 tsp. powder)
3 Tbsp. refined coconut oil, melted
1/8 tsp. salt
4 1/2 tsp. Ener-G egg replacer powder
1 tsp. cornstarch or arrowroot
6 Tbsp. very warm water
1 Tbsp. cognac or other brandy

Find a large metal bowl. Fill a wide saucepan with water about 1/2 full, or up to the level that it is almost touching the bottom of the bowl when the bowl is set into the top of the pan. Double boil the chocolate and the Earth Balance until melted, stirring occasionally until very smooth. Set aside to cool, stirring occasionally to keep the texture even.

In a blender, puree the tofu, salt, and coconut or soy cream until very smooth. With blender still running, drizzle in the melted coconut oil slowly, blending until fully emulsified. (Taste this plain - see what I mean?)

Whisk the heavy cream mixture and cognac into chocolate mixture until thoroughly combined. Set aside.

Thoroughly sift egg replacer powder with corn starch or arrowroot, then whisk with 6 Tbsp. very warm water. Use a hand mixer to rapidly whip the egg replacer until it forms a thick foam. If it isn't thickening properly, make a paste out of some more corn starch or arrowroot and a little warm water and beat it in to the egg mixture.

When your fake egg whites are stiff, fold them gently but thoroughly into the chocolate mixture, then pour the mixture carefully and gently into small cups or containers, and chill for about 2 hours.

Serve with whipped cashew cream, fresh fruit, a nice jam, or anything that sounds good to you. You can also freeze it for a delicious vegan chocolate custard ice cream. That's how I'm eating mine; somehow I can handle the richness better if it's frozen. Enjoy!

.

Saturday, February 12, 2011

Crepe Use #2: Gateau with Walnut and Pear, Topped with Pear-Infused Whipped Cashew Cream


I recently purchased a crêpe pan - a 9-1/4-inch, French-made, solid steel crêpe pan- and a lot of culinary hopes rested on its performance. I was emotionally invested in my success as I attempted this recipe recently at the home of a friend, who no doubt doesn't appreciate what I did to her kitchen (but has been very gracious and pretended not to care). As you may remember from my last crêpe blog, and before that from the latke blog, I tend to get angry at food when it doesn't perform well, and if it is in a solid state, I tend to stab it with any handy utensil. Usually my audience for this is limited to my dog, who sits back and waits for me to drop something she can eat, but one of the hazards of cooking in someone else's home is that they have to witness your tantrums, too. And so does their dog. Sorry, Lindsay and Magic.

Any time you're working with a new pan, there's a getting-to-know-you period. My crêpe pan and I, we had a smoky, sticky, burn-y first outing, but with a little bit of practice and lots of temperature adjustments, we finally started to turned out some beautiful crêpes, and overall, the gâteau came together very nicely, don't you think?


My new pan isn't non-stick, and doesn't need quite the level of heat that my old pan did, so I ended up working with very light oil and medium heat (I know, right?!). In classic crêpe making, you tend to heat the pan up very hot, until it's smoking, then picking it up, adding batter, quickly swirling the batter around the pan, and returning it immediately to the heat to cook for about 30 seconds until flipping. I had much better luck at medium, letting the pan fully reheat in between, then holding the pan at about a 45 degree angle and adding the batter from the top, then swirling carefully, then keeping the pan off the eye for about 10 seconds to let the heat disperse into the crêpe and cook the bottom more evenly. Once that has happened, I returned it to the heat, flipped it after about 30 more seconds, and cooked the other side for about that long. Et voilà!

Before you begin this recipe, note that there is some prep time; the crêpe batter needs to be made and the cashews soaked the night before, the cashew cream needs to chill for a couple of hours to firm up, and the pear-water will need to simmer for a while, too. But with a little planning, this shouldn't be any trouble.

Sweet Crêpes

Note: Depending on how many "practice crêpes" you'll need to make, and how large you want your gâteau to be (and how large your pan is), you may want to double this recipe. I did, just to be safe, and ended up needing them all after my initial new-crêpe-pan failures.

1 c. cold water
1 c. coconut milk
1 1/2 c. flour
Egg replacer equivalent to 4 eggs, prepared according to package instructions
1 1/2 Tbsp. sugar
5 Tbsp. melted Earth Balance or other vegan margarine
a pinch of salt

Pour liquid ingredients into a blender. Blend at low speed, adding dry ingredients slowly in small amounts while the blender is running (through the hole in the lid), then drizzling Earth Balance in as well. When all ingredients have been added, blend for about a minute, then store in the fridge overnight, or at least 2 hours, to let the gluten develop and let the air bubble out. When ready to use, follow directions above. Don't try to use too much batter at once; most pans should take between 1/8 and 1/4 cup.

Walnut and Pear Filling

1 1/2 c. chopped walnuts
Agave nectar
2 large pears

Finely chop the walnuts, and combine with agave until thoroughly coated. Add a little more agave and a little bit of water, adjusting each until a syrup forms with the nuts. You'll need to be able to spread the mixture, so that's the consistency you're going for. Either dice or very finely slice the pears, depending on your preference and their texture. Cover the pears if you're not going to use them immediately. Reserve the pear cores and any remnants for the cashew cream


Pear-Infused Whipped Cashew Cream

1 c. cashews, rinsed and soaked overnight
Pear remnants, simmered slowly in 4 c. water until reduced by about half
1/4 c. agave nectar
1/2 tsp. vanilla
2/3 c. refined coconut oil, melted

Place cashews in a blender, then pour pear-water over them until they are just covered. If that isn't enough liquid to cover the cashews, add a little more water until the cashews are barely submerged. Blend, beginning on a low speed and working your way up to the higher speeds. Cashew cream should become perfectly smooth; there should be no perceptible graininess. Once it is the right consistency, reduce the speed and drizzle in agave and vanilla. Once the cream is thoroughly blended, up the speed a bit and slowly drizzle in the coconut oil, continuing to blend until it is thoroughly emulsified. Transfer to a container and chill for at least 2 hours.

 
Once you've made all your crêpes, find a serving plate and place a nice, big crêpein the middle. Pile on a couple more, spreading a little agave nectar (thinned with a little water, if necessary) in between to help them bind to each other. Decide how you want to distribute your filling, depending on how many crêpes you have, and plan ahead. 2 layers each of pear and walnut work well. When you reach the level where you want your first layer, spread  half of your walnut mixture, stopping about an inch and a half from the edge. Place the next crêpe on top, gently pressing down to solidify the gâteau and to seal around the edges of your layer of filling. Add a couple more crêpes, then repeat with a layer of pears. Repeat until you're out of filling, then add all your remaining crêpes, brushing with agave in between and gently pressing occasionally. when you're done, you can let it sit for a bit or cut immediately, serving with a drizzle or a dollop (it depends; mine was unexpectedly more of a drizzle this time, mostly because I didn't want to wait to chill it) of the cashew cream. Enjoy!

Thanks to Lindsay Lanois for the gâteau inspiration, collaboration, coffee, mimosas, and for the use of her kitchen!

Tuesday, December 14, 2010

Mexican Chocolate Christmas Cupcakes

I'm not much of a dessert person, but I bought Vegan Cupcakes Take Over the World recently for someone for Christmas, and I dipped in to it a little myself and got slightly carried away. Cupcakes are kind of enchanting - small, sweet, self contained, prettily decorated, promising just enough indulgence - and I went a little crazy. I made marzipan poinsettias to top them and gave them to friends for Christmas.


I started with a recipe from Vegan Cupcakes, and after several test batches, here is my adjusted recipe for Mexican Chocolate Cupcakes:

1 c. coconut milk
1 Tbsp. ground flaxseed
1 c. granulated sugar
1/3 c. canola oil
3/4 c. all-purpose flour
2 Tbsp corn flour (like Maseca Masa flour that you can buy at your local Mexican store)
1/4 c. almond meal
1/2 c. cocoa powder
1 tsp. baking powder
1/2 tsp. baking soda
3/4 tsp. salt
1-2 tsp. ground cinnamon, depending on how much you like
1/8 tsp ground cayenne (or more, if you like - I don't know that I'd exceed 1/4 tsp., but I haven't tried that much yet)
1 tsp. vanilla extract

Preheat oven to 350 and line muffin pan with cupcake liners. Whisk together coconut milk and flaxseed, allow to sit for 10 minutes. In another bowl, sift together all-purpose flour, corn flour, almond meal, cocoa, baking powder, baking soda, salt, cinnamon, and cayenne. (You can make the almond meal yourself to save some money - just drop almonds into boiling water, then pull them out after about a minute and drop them into ice water, then pull them out after a minute. The skins should pop right off - then dry them well and grind them in a food processor or spice grinder. Presto - almond meal). Whisk sugar, oil and vanilla into coconut milk mixture. Gently add wet ingredients to dry. When blended, fill each cupcake liner to 3/4 c. full, then bake 22-25 minutes. After you put the cupcakes in, don't even open the oven until at least 22 minutes have passed, then test for done-ness. Cool completely before icing.

Icing (this is genuinely impressive - the heft and richness is fabulous):

1-12.3 oz package of extra-firm silken aseptic tofu (like Mori-Nu)
1/4 c. plain (full-fat unsweetened) soymilk
2 Tbsp. agave or maple syrup
1 tsp. vanilla extract
1-12 oz package of semisweet chocolate chips

Crumble tofu into blender, add soymilk, agave and vanilla. Puree until completely smooth, set aside. Melt chocolate chips in a double boiler, cool 5 minutes, stirring occasionally. Add chocolate to tofu and blend until combined, then transfer to a covered container and chill 1 hour.

I like cake better than icing in general, so I just spread the icing on top of the cupcakes, and using that amount, the above recipe will ice well over 2 dozen cupcakes. If you were piping the icing on to the cupcakes with a pastry bag, it wouldn't go quite as far, but I still think that you could get almost 2 dozen.

If you wanted to make the marzipan poinsettias, you'll need marzipan, red food coloring (gel works well - it makes less of a mess and adds less liquid), and pearl or silver dagrees. Cut off however much marzipan seems appropriate to you, then cut it into smaller pieces (just to make it easier to mix in the food coloring). Squirt some food coloring over the marzipan, and knead it in. Roll the marzipan into a log, then divide into 12 pieces, or however many cupcakes you have. Take one piece, and divide it into 6 little pieces. Roll each piece into a teardrop shape, then squish into a flat petal shape. As you make your petals, transfer them to a piece of wax paper so that they don't stick to anything while you work with them and assemble your poinsettias. Use a toothpick to put a line down the middle of each petal. Once you have 6 little petals, take 3 and arrange them into a trefoil shape, pressing their fat ends together a little. You can also use a q-tip to wet the ends to help them stick together. Next, carefully press the remaining 3 petals on top of your base, with each new petal pointing in between the two below it. At this point it may be particularly helpful to wet the part of the underside of the petal that will be touching the petals below it. Once your poinsettia is assembled, gently wet the center of each flower with your q-tip and place some dagrees (however many look best to you) in the center. Press each in to the marzipan gently with the end of a toothpick. Store them in the refrigerator until you're ready to use them.